Last reviewed: 08/8-2024.
When you start your journey towards ESEF compliance with ParsePort, the first step is to fill out the information in the General Data sheet.
Note that when you receive the Excel template from us some fields will be filled out already based on information we already have.
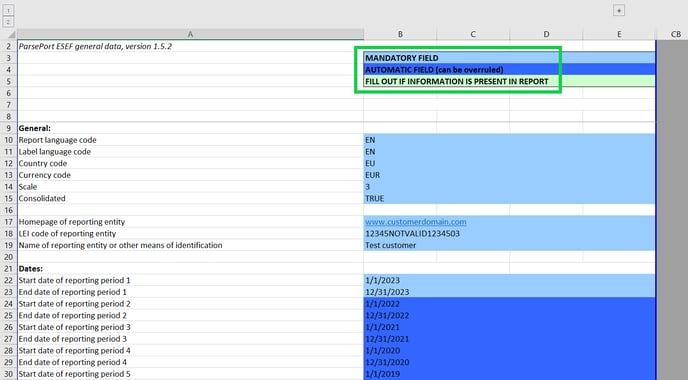
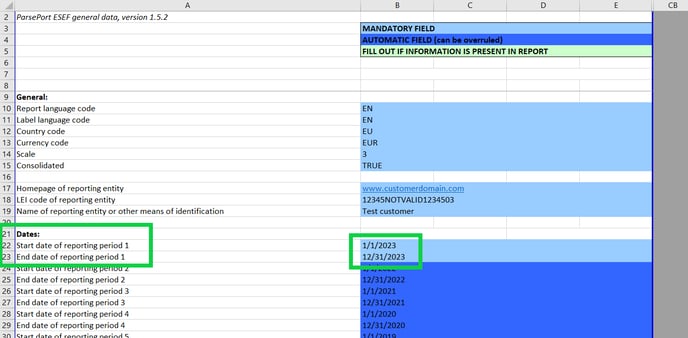
The general data sheet is color coded:
· light blue cells are mandatory
· dark blue will fill out automatically based on information in other cells
· green cells are optional
Please note that at the top of the GD tab you will find an overview describing how to navigate the template.
The GD sheet is split into four main sections (general, company information, dates and technical).
Below you will find an explanation of how to fill out the information needed in each section.
1. General
The first two lines in this block of information correspond to the language of the ESEF package and the master language.

- Report Language Code: You need to select which language you are using in the PDF. Simply select the corresponding language from the drop down menu.
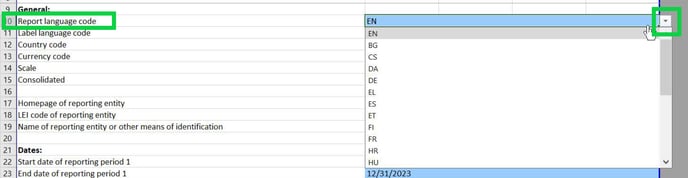
Please remember to include the language suffix stated in this place in the name of the PDF file before you start converting both files in ParsePort platform. - Label Language Code: Select the language in which the accounts in the conversion Excel are presented. This is your master language.
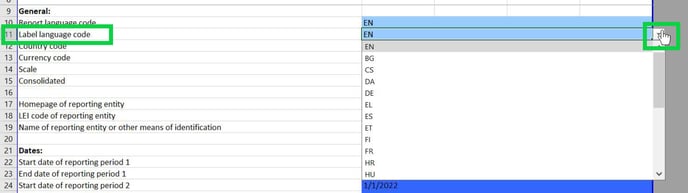
Please note that the label language code will be set automatically to match the report language code but can be reverted if the two differ.
Please be aware that the Label language (Master language) needs to remain as originally stated, even if the report (PDF) changes languages. Changing the Label language (Master language) of the Excel template will require migration and readjustment of mapping in our database, which will result in extra cost.
Further lines correspond to basic information about the report.
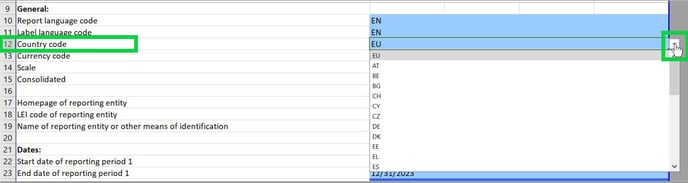
- Country Code: Select the issuer country code from the dropdown menu. Please note that if you report in more than one country it is important to change this information every time you create a package for a different issuer.
- Currency Code: Input the currency code for the currency you report in such as EUR, USD, DKK, NOK etc.
- Scale: For the scale, you need to input which scale you report your figures in. You can choose between four preset scales from the dropdown menu.

- Consolidated: Select “TRUE” or “FALSE” from the dropdown to divulge whether you are reporting consolidated or non-consolidated figures.
2. Information about the entity
The 2nd block of information is strictly connected with your company data. Lines in this section are colored in blue which means that it is mandatory to be filled out.
Please follow the instructions below on how to fill out the information about the company:
![]()
- Homepage of Reporting Entity: Simply fill out the URL to your company’s homepage.
- LEI Code of Reporting Entity: You need to fill out the LEI code of the entity. You can find your company’s LEI via the Global Legal Entity Identifier Foundation webpage.
- Name of Reporting Entity or Other Means of Identification: In this field, you simply need to fill out the name of your company.
- Start Date of Reporting Period 1: Fill out the beginning of the current reporting period. For 2021, for instance, 01/01/2022.
- End Date of Reporting Period 1: Fill out the end of the current reporting period. For 2022, for instance, 12/31/2022.
- Other Reporting Periods: The start and end of reporting period 2 and onward will automatically update based on the information input in period 1. If you change your reporting period, you need to manually override the information in the cells. This is done by simply typing in the reporting period you want to add for the given cell. Be aware that inputting information into the cell, will remove the automatic updates of the cell in question, which means it will need to be updated manually going forward.
4. Technical
Information in this section is filled out automatically based on your previous input. There is nothing you are required nor should fill out here yourself. Please find below an explanation of the selected ones.
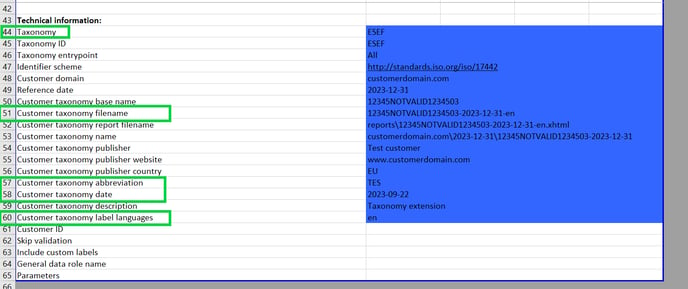
- Taxonomy: This line will be filled out automatically with the latest released version of the ESEF taxonomy. There is an option though to switch to the older taxonomy versions via the drop down menu. Each taxonomy is followed by a date, which is the date the taxonomy was published.
- Customer Taxonomy Filename: This field determines what the name of your file will be after applying rules for local naming conventions. This field will be filled out when you receive the conversion Excel from us. If you need to input or change the name of your file to follow the rules set forth by your OAM, you should contact us, and we will help you to set the parameter correctly.
- Customer Taxonomy Abbreviation: This field will automatically be updated to contain the first three letters of your customer taxonomy name. Please note that if we used extensions to map some elements in your report, their name will always start with those three letters used as a unique reference.
- Customer Taxonomy Date: This field is automatically updated to reflect the current day.
- Customer Taxonomy Label Languages: The language of the label descriptions in your converted iXBRL file is based on the language you choose in this section, and you will also be able to export a fact and extensions list in any of the chosen languages. You can select multiple languages by inputting several language codes and using commas as separators.
- Example: Input: "en, fi, sv" without the quotation marks, to create a report where the label descriptions can be displayed in English, Finnish, and Swedish.

- Customer ID: A Customer ID will be filled in when you receive the Excel template from us, and it shouldn't be changed/removed as it refers to the database where we store information about your mappings.
If you still have any questions related to filling out the general data sheet or any other part of the conversion process, send an e-mail to support@parseport.com and a member of our support team will get back to you.