Last reviewed: 20/9-2024.
From time to time, you will need to perform an update of your General Data sheet (not the information, but the code). Luckily, this is a very easy process.
Before you perform the update, however, you will need to download the latest version of our 'Tagging Template'. Download the latest version of our Tagging Template here and follow the indications there.
WARNING: We urge you to follow the instructions closely. The general data sheet contains hidden information, which is needed for the ParsePort Platform to read the file properly. Editing or deleting any of that information will cause errors.
Performing an Automatic Update of the General Data Sheet
If your current Excel template is outdated, you can perform an automatic update of the General Data sheet by following the directions below. If your Excel template is version 1.1.4 or earlier, you instead need to follow these directions.
- When you have downloaded the latest version of the General Data sheet, you need to open it along with the Excel template you use for conversion. Make sure you are on the correct sheet in the file titled ESEF Tagging Template. Note: the update file for the general data sheet is protected by password, but you can perform the update by choosing to open the file as "Read Only" when prompted to type in a password.
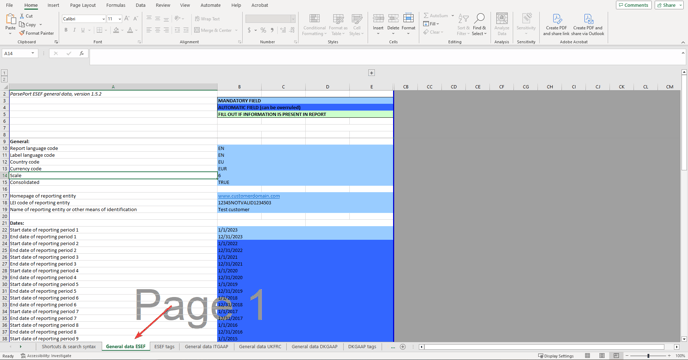
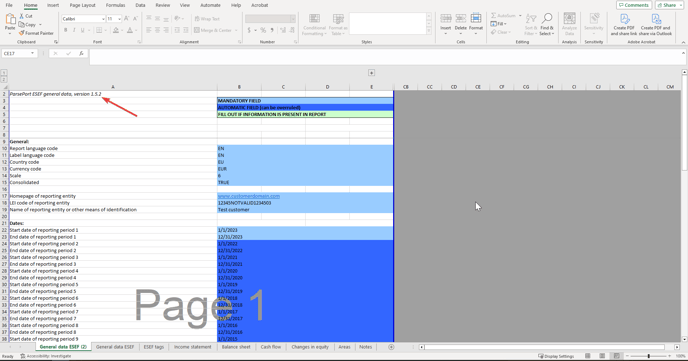
- Then navigate to the General Data ESEF sheet of the Excel template you use for conversion. Notice that the version number in the top left corner of the sheet is different from the one in the ESEF tagging template you downloaded.
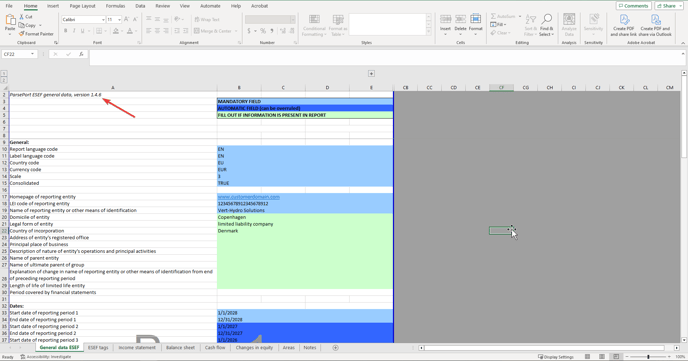
- While in the General Data sheet of the Excel file you use for conversion, press "ctrl+W". This will update the code behind the general data sheet without changing the information you've already added.
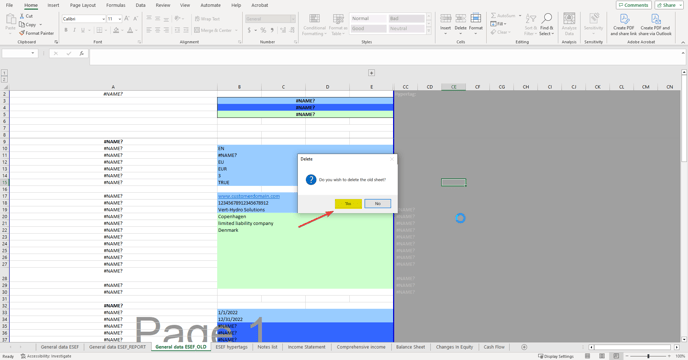
- Afterwards, a window will pop up asking if you want to delete the old general data sheet. Press "Yes".
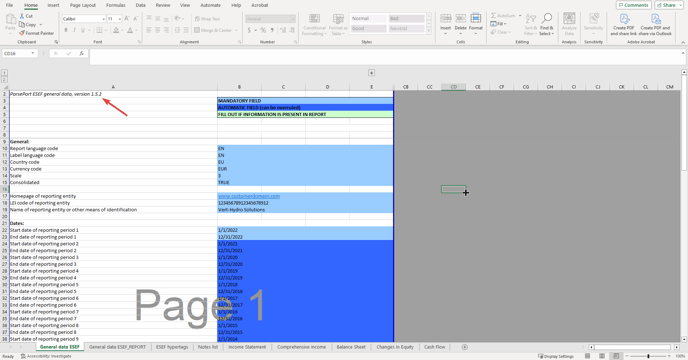
- After you've performed the update, look in the top left corner of the General Data sheet. It will now display the same version number as the template you downloaded.
-
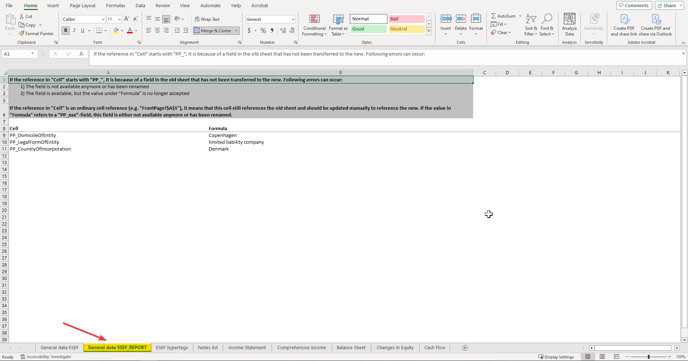
Please be aware that the latest version of the Excel template won’t contain green area in the GD sheet where you included information about the company. Do not worry though. After performing the update, you will be able to find this information on the newly created sheet “General data ESEF_REPORT”. Feel free to delete that sheet when data is saved elsewhere.
How to Manually Copy or Move the General Data Sheet
If your current General Data sheet is of version prior to 1.1.5, you won't be able to automatically update the general data sheet as described in the process above. Instead you need to perform a manual copy, and simply selecting the cells in the General Data Sheet and pressing "copy" will not be enough.
- Start by making sure you open the latest version of the general data template. You can download the latest version of the of the general data template here;
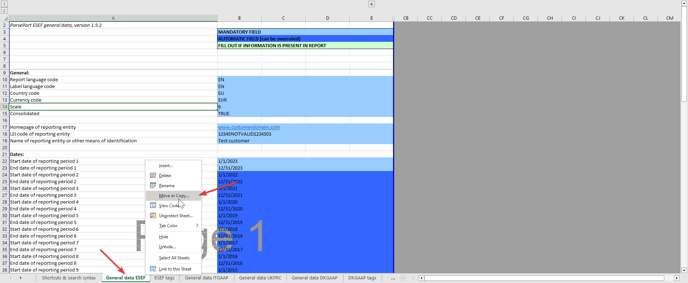
- Right click the tab titled "General Data ESEF" and select "Move or Copy..." which will open a pop-up window with the options to either copy or move the selected sheet;
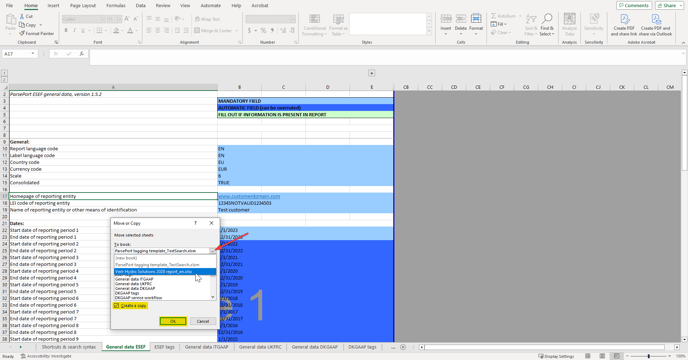
- Mark off the check box that says "Create a Copy" in order to copy the sheet;
- Select the workbook you want to copy the general data sheet to from the dropdown menu at the top and finish by pressing "Ok";
- This will copy the selected sheet to your chosen workbook, but it will not delete the old copy of the General Data Sheet, which means you will now have a sheet titled "General data ESEF (2)" and a sheet titled "General data ESEF";
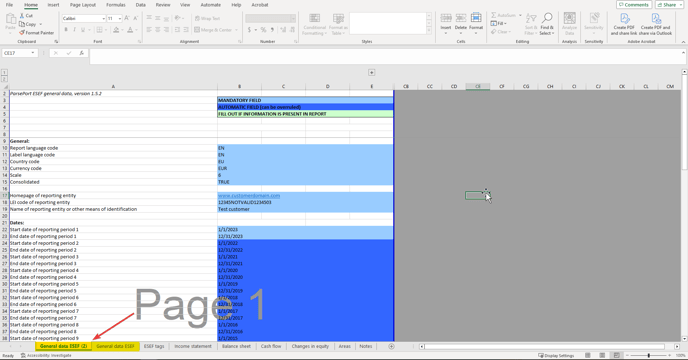
- All that is left is to delete the old sheet and rename the newly updated sheet to "General data ESEF". To make sure you keep the right sheet, you can check that the versioning number found in the top left corner of your sheet corresponds with the latest update template.
Performing an Automatic Update of the ESEF Hypertags/ESEF tags Sheet
Updating both the ESEF tags or Hypertags sheet is done in the same way as updating the General Data sheet. The same steps presented above can be followed to update the Hypertags sheet. Keep in mind, you need to be on the tab in order for it to work.