Last reviewed: 20/9-2024
Please, keep in mind that this is a suggestion on how to use this tab but the application of hypertags in your visual input file does NOT require the information below to be present in the technical file (Excel) before the conversion). The hypertags will work.
At first glance, the ESEF Hypertags-sheet may look a little complex. However, it is relatively simple to use as soon as you understand exactly how to use it. This guide is intended to explain how to use this tool to help ease your Block Tagging-process going forward.
Layout
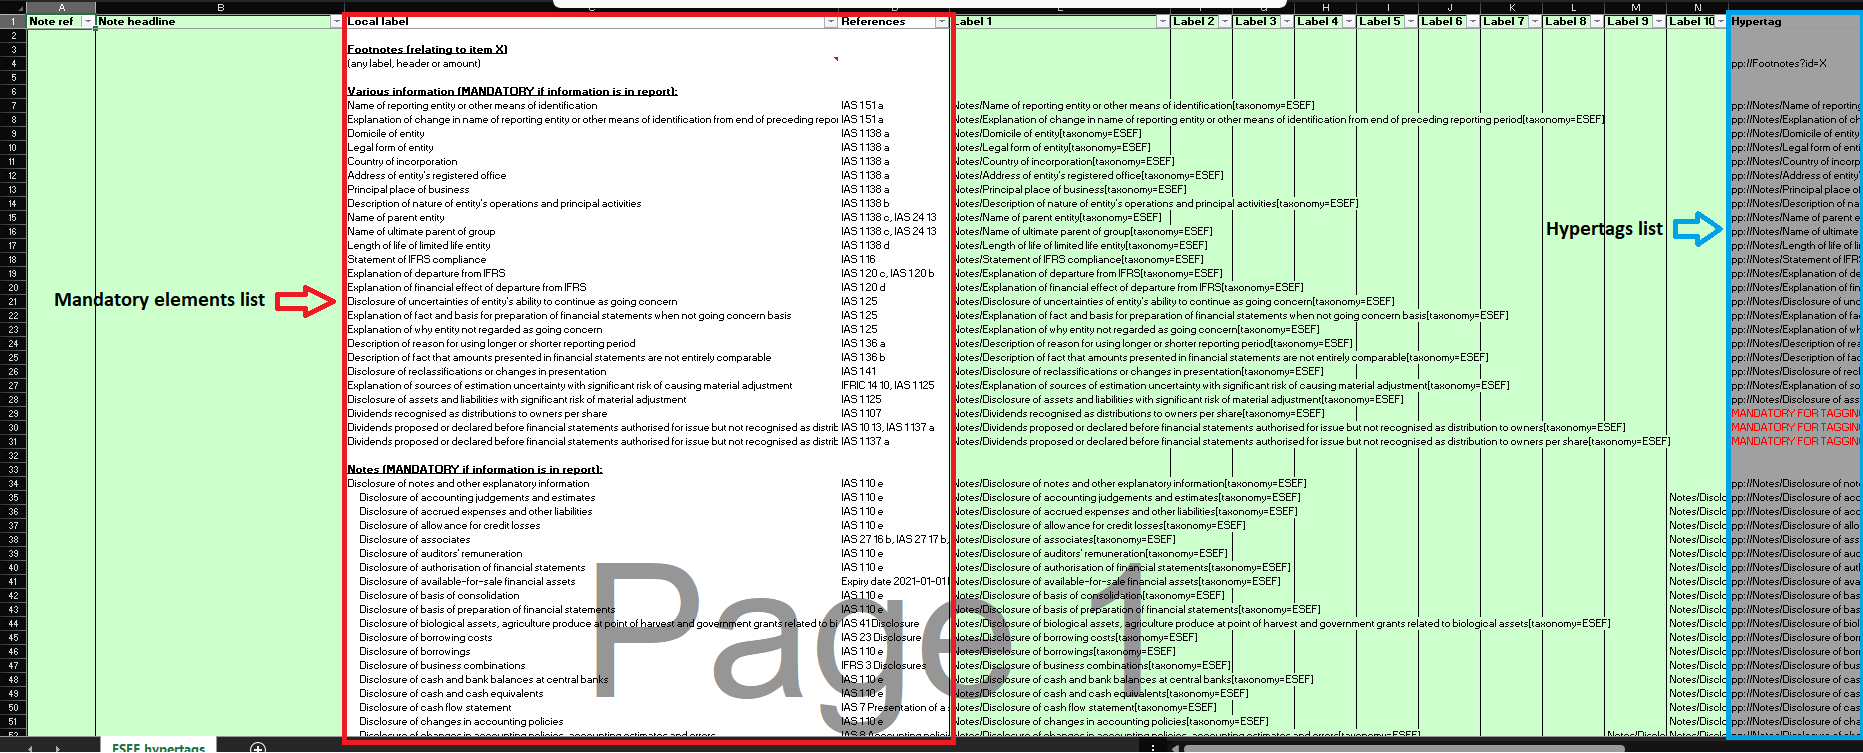
The main components of the ESEF Hypertags-sheet are the mandatory note/accounting policy elements, as well as their corresponding hypertags. The mandatory elements list is marked in red and the hypertags are marked in blue, below.
Features
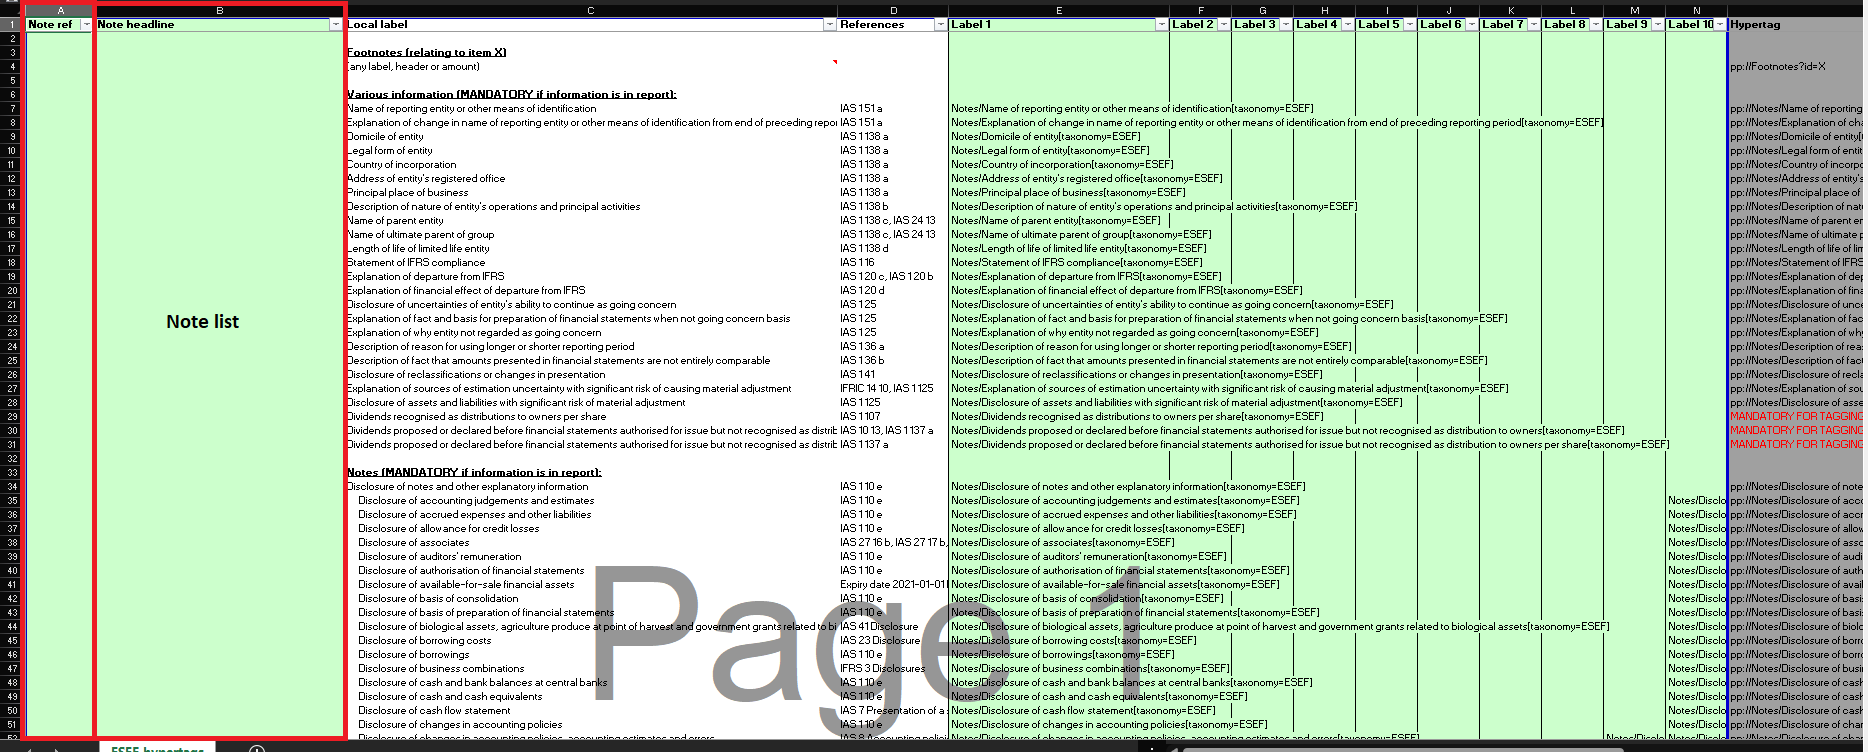
1. Includes Note ListThe sheet has incorporated a 'Note list' to help you gain an overview of which element(s) you want to tag which note with. This way, everything you need to use for Block Tagging your notes is gathered on a single page (illustrated below).
Gathering everything onto one page will ease the process going forward, for several reasons. Firstly, this eliminates the need of having to copy and paste note elements, and their corresponding hypertags, from one page onto another. This removes the risk of copying and pasting the wrong information, especially when you have a lot of notes that need to be tagged. Secondly, keeping all technical data regarding Block Tagging on one page, removes the need for updating separate pages each time ParsePort updates the template.
The Note list-function is purely to aid the general overview of which hypertags you want to use for Block Tagging. It is not mandatory and will not affect the technical data when converting to your iXBRL-file. However, we recommend using it, not just internally, but also to share with auditors, designers and/or ParsePort support team, as this will help the viewer gain an overview of the chosen tags.
2. Includes multi-tagging function
Our ESEF Hypertags-sheet now supports the semi-automated creation of multi-tags. We have come up with a very time-effective way of incorporating any combination of elements into a single tag. This allows for the user to bypass the time-consuming process of having to separately tag each note with all the possible elements that cover the specific note. Now, the user can combine several different elements into one single tag, hereby only having to hypertag a note section once. Information about how to use this feature, can be found using this link.
How to use the ESEF Hypertags-sheet
1. Decide on hypertagsThe first step is to go through all the notes in your previous annual report (as most notes will often be re-used for next year) and agree, together with your auditor, on which element(s) you want to hypertag each note with. If, for a certain note, you cannot find any element(s) in the mandatory list that matches, take a look in the full ESEF taxonomy. If you find an element here that you want to use (that is not in the mandatory list), write an email to support@parseport.com, and we will create a hypertag for you. We also have the ability to create taxonomy extensions, if you have any notes that contain very specific information that cannot be covered by any existing element.
2. Insert ‘note reference’ and ‘note headline’Then, insert the note references (e.g. ‘Note 2 (p.48)’, ‘2’, ‘2.1’, ‘2.1.1’, etc.) and note headlines for the notes you want to tag, in the cells to the left of the specific mandatory elements that you want to use for those notes (example illustrated below).

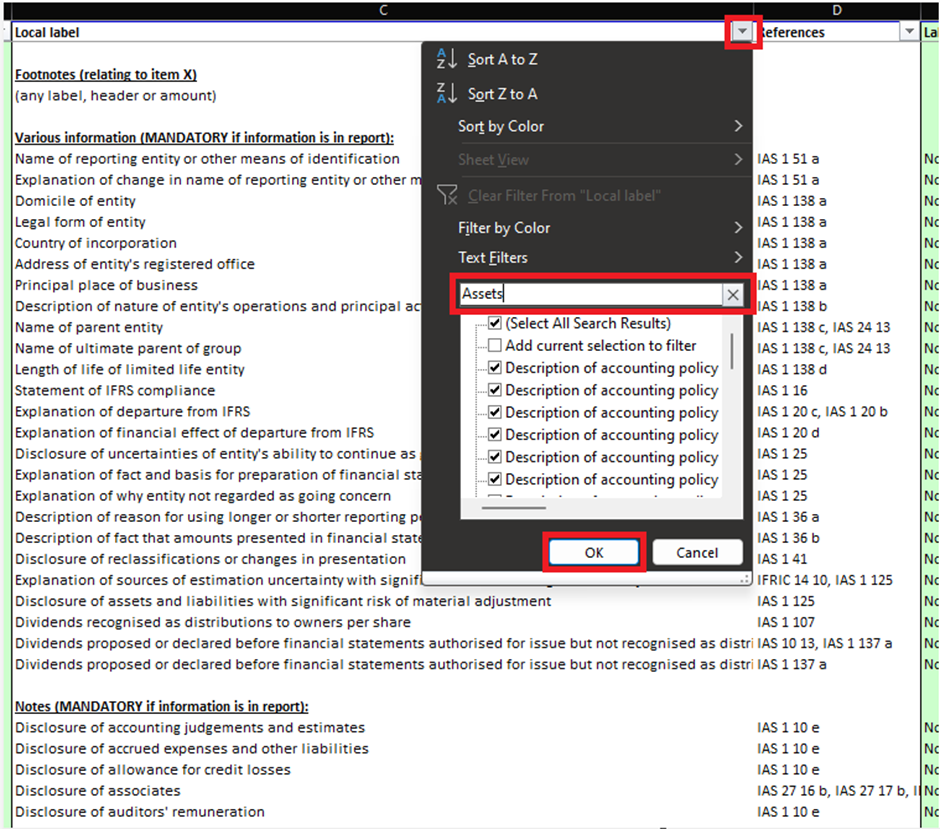
Perform this with all your notes. To easier find the element you are looking for, click the small triangle in the top-right corner of the “C”-column and type keywords into the search-bar (illustrated below).
To get a better overview of just the elements that you are using for your notes, press the small triangle in the top-right corner of the “A-” or “B”-column and de-select “Blanks” (illustrated below).
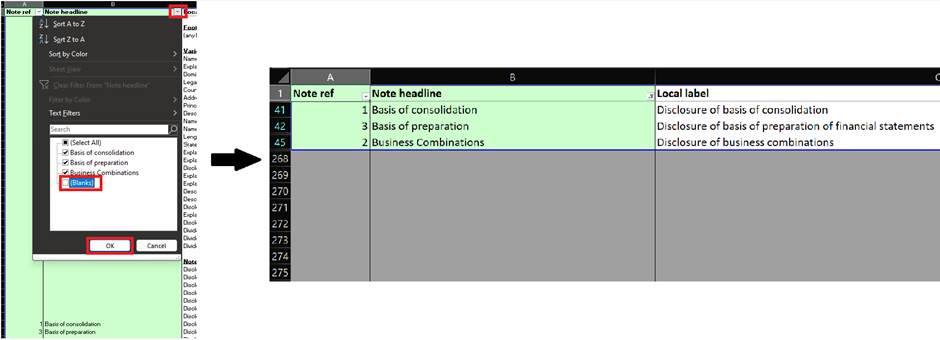
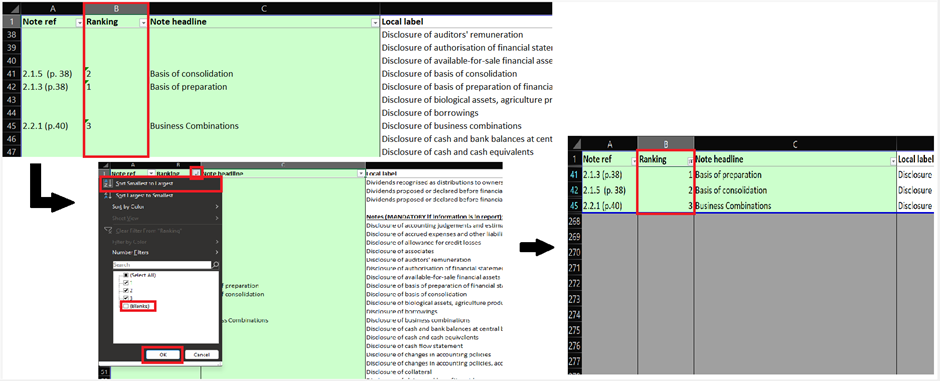
If you want to sort the sheet in the chronological order of your notes in your report, you can do this by clicking the small triangle in the top-right corner of the “A”-column. Then, click “Sort Smallest to Largest”. This cannot be done if your note references are stated as e.g., ‘2.2.1’. If you have stated your note references as such, you can use the following work-around (illustrated below): First, create a new column to the left of the “B”-column. Second, put ‘1’, ‘2’, ‘3’, … next to your specific notes, in the order that they exist in your report. Lastly, sort this column from smallest to largest and de-select blanks.
The list that you create using the green columns to the left of the white area containing the mandatory elements, can be sent to your auditors and/or designers, to give them an overview of exactly which notes you want to tag with which elements (i.e., their corresponding hypertags).
If you have any further questions regarding the use of the ESEF Hypertags-sheet, or anything else, feel free to contact us at support@parseport.com, and we will get back to you as quickly as possible.